Tuesday, May 22, 2018

How to Repurpose a Wooden Ladder into Linen Rack

A Wooden ladder re-purposed as a Linen Rack


In this short tutorial we will take a simple and weathered old wooden ladder and repurpose it into a practical linen rack. 
Considering that wooden ladders are very much a thing of the past,giving ways to the most ingenious metal ladder designs available on the market today, you may have to opt for looking at your local thrift shops for this forgotten relic.
A Wooden ladder re-purposed as a Towel Rack
Above are a few close up shots of the spray paint colors used to refinish this wooden ladder. We decided to go with the soft sheen of satin white and the reflective tones of the metallic chrome.
You may also notice that we decided to leave some inconspicuous areas of the ladder where the natural wood tones are shown.  
A Wooden ladder re-purposed as a Towel Rack
In the collage of images above you can see how we grouped a series of 7 towels. this particular ladder with an average height of 6 feet could easily rack 10 towels. Not to mention the top of the ladder that could also make way for extra folded towels and or rags.  

A Wooden ladder re-purposed as a Towel Rack
In the set of images above we added a few items that can also be displayed ready for use. Amongst these are body wash,sugar scrubs and aromatherapy products. 
You can chose to display any color towels of choice to match your bedroom or bathroom decor taste.    

A Wooden ladder re-purposed as a Towel Rack
On the top shelve of the ladder we were also able to place extra towels neatly folded and or bath rags, and glass jar for easy access to bath sponges and soap bars.
As you can already see, this old wooden ladder has been resurrected with new life giving it meaning and purpose. 
A Wooden ladder re-purposed as a Linen Rack
We added some gorgeous throws and scarves ready for the picking. You may choose to hang many or just a simple few adding character and punches of color to the your decor theme.  
A Wooden ladder re-purposed as a Linen Rack
In the above images you can see how it transformed from a common regular household handyman/handywoman tool to a creative, functional and integral display rack fit for any interior decor. 

Conclusion: It is needless to say that there are things in our living spaces that seem to get old and unpleasant to the sight as time goes by. Nevertheless,with a little ingenuity and "elbow grease" you can turn any old item into a piece of interior or exterior decor item that will be worthy "YOUR" space made perfect. 

Please take a further look into more of our D.I.Y projects and LIKE US  when visiting our YouTube channel.  
Create It....Love It....Share It !

Friday, April 13, 2018

Ideas for Repurposing a CD Rack into Floor Lamp

How to Repurpose a Cd Rack by turning it into a standing floor lamp

In this streaming digital media world, cd's and dvd's are soon to become things of the past, an anthology if you will. 
In this post we will take a simple floor standing Cd rack and re-purpose it into a work of art that will not only provide warm and subtle illumination to your living space, but also serve as an interesting and unique conversational piece. 

For this project we will only need a few simple tools that any beginner Do It Yourself and/or beginner handyman or handy-woman should have at his/her disposal.

Items Required are
1. floor standing CD Rack

2. 60 x 1 inch Pine wood (Pine wood is inexpensive and we love it because its wood grains are very bold and pronounced when stained.)

3. Metallic Spray paint (your choice of color(s))

4. Lamp Pull Chain & Sockets kit (your choice of 1 or 2

5. Sample size can of PolyUrethane wood stain
(This step may be skipped by simply painting the wood)
6. Staining cloth or lint free cotton cloth (if using wood stain option)

7. 8 x 8 x 1 inch square of pine wood 
These are what some of these items look like. visiting your nearest local hardware store should have these readily available. We chose Minwax Poly Shades for the wood stain because it provides color as well as the protection and sheen of polyurethane (2 in 1). 

Tools Required are:

1. Drill, 1/4 inch & 3/8 inch drill bits

2. Wood glue (optional for a tighter bond)

3. Wood Screw 

4. Cable ties and/or strip of cable organizer/management 


Below are some images of what these items look like as we put this floor lamp together


Repurposed CD Rack into a standing floor lamp with double sockets and pull chain
In this mage you can appreciate the metallic paint color used for the rack. The pull chain was kept in its original gunsteel color. The pine wood was stained,but we will see this up close a little later on. 
Repurposed CD Rack into a standing floor lamp with double sockets and pull chain
Seen above is the base of the Cd rack sitting on a 12 x 12 concrete paver. This was a personal choice since we wanted the lamp to stand taller.  
Repurposed CD Rack into a standing floor lamp with double sockets,pull chain and lamp finial
You may choose to use any style finial. We opted for this round chrome style. 

Repurposed CD Rack into a standing floor lamp with double sockets and pull chain
We opted to use two Lamp Sockets with Pull Chain,a large detachable harp and low wattage LED bulbs. Left(lights off)Right(Lights on).

Make sure your harp is large enough so that when the lampshade is harnessed it sits above the bulbs without making them visible at eye level. 
Repurposed CD Rack into a standing floor lamp with double sockets and pull chain
In the above image we used the 8 x 8 x 1 pine wood and attached it to the 1 x 60 inch long pine wood we used as the support leg for this floor lamp. The square pine wood was attached to the 60 inch leg by lining it up to the back of the Cd rack and applying some glue and a single wood screw.  
Drill to create the  1/4 opening for the pull chain and the light socket harness that comes along with the kit. 
Repurposed CD Rack into a standing floor lamp with double sockets and pull chain

You also want to drill holes about 3/8 inch in order to make the detachable harp fit snugly into the 8x8x1 square base. 

Note: Since we are creating a double light socket floor lamp, "the steps you do on one side must be repeated on the other side of the top square base".


Repurposed CD Rack into a standing floor lamp using pine wood as supporting leg
Here is an up close look of the pine wood used as the supporting leg. We opted for a polyurethane stain instead of painting it to give it a more sophisticated, interesting look. 
The entire Cd Rack was painted in metallic steel spray paint. This blended very well with the charcoal background of the wall.
Repurposed CD Rack into a standing floor lamp using pine wood as supporting leg
Above is a side view look at the rack near completion. A cable organizer was used to neatly keep them in place and tucked from sight behind the leg of the lamp. 
Repurposed CD Rack into a standing floor lamp using pine wood as supporting leg
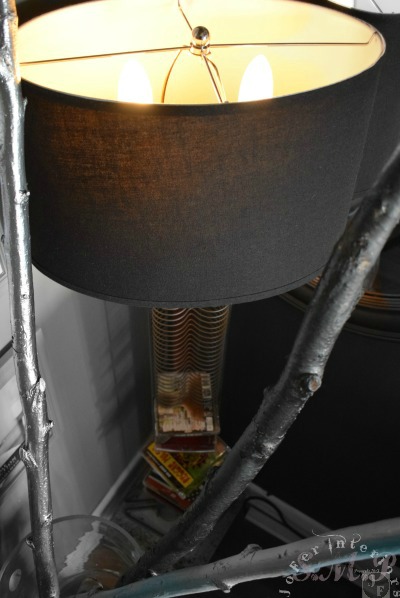
A gorgeous oval shaped,charcoal black, upholstered lampshade was used for the finished project.

Repurposed CD Rack into a standing floor lamp with double sockets and pull chain
Notice here that the 1 x 60 inch pine wood used for the leg takes the full length of the rack (top to bottom). We used cable ties to secure it to the bottom of the rack since we did not use wood at the bottom.  
Repurposed CD Rack into a standing floor lamp with double sockets and pull chain
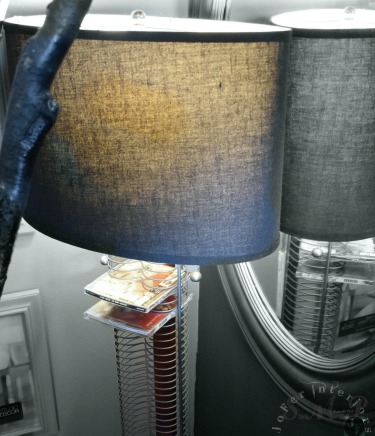
Another image of the finished product. We added a few SACDs and Audio Cd's from the owners vintage collection to give you an idea on how this old played out cd rack could still serve its original purpose, while bringing subtle ambiance lighting to the space.  

Note: As we mentioned previously, take notice on how the lampshade sits high above the LED bulbs.This photo taken at birds eye view,shows you how you can't see the wood base and sockets used for this lamp. Mission accomplished.


How to Repurpose a Cd Rack by turning it into a standing floor lamp
Another close up on how the Cd and DVD Media sits on the top rack. This was used in a living room space and by coupling it with a black lampshade and the black steel metallic paint on the rack, it blended perfectly with the  charcoal colors of the walls. 

If you have a dedicated media room such as a Home Theater, this will be a perfect match for such a theme.

Below we have added a short video snippet of the completed project 
~ENJOY~
This video was created and meant for information purposes and is in no way 
related to the content ads viewed on this page.

Please take a further look into more of our D.I.Y projects and LIKE US  when visiting our YouTube channel.  
Please don't forget to leave us a comment and remember CREATE IT....LOVE IT....SHARE IT
   

Monday, February 19, 2018

How To: Ideas on Refinishing Home Entertainment Wood Veneer Equipment

Refinishing home entertainment equipment furniture to complement your interior design

So you have a great set of speakers, but you just don't like the way they look when incorporated into your interior decor. 
The problem also lies in the fact that with speakers such as Subwoofers which will have to be placed somewhere on the floor, do not always match or blend well with the overall scheme or color of your flooring or walls. 
Considering there are many inconspicuous Subwoofer placement ideas that could give you great sound, let's face it,  depending on your room layout you may not always be able to place that speaker behind a couch or nestle it into a wall out of plain sight.  

What if my budget does not allow for custom tailored speakers ?
We believe to have a simple cost effective way to give those speakers a facelift while also giving it a custom look that will blend seamlessly into any decor scheme. 
When it comes to these circumstances, you have to make the best choice possible by deciding whether matching the flooring or the walls would appease your personal style and decor. 

In this particular post we have decided to match the floor speaker to the walls behind it in the best way possible, therefore creating fluency in the room as opposed to having your eyes suddenly stop at the site of the bold black speaker cabinet enclosure

3 Reasons why you want to keep furniture pieces light in color.

Visual Flow / Airiness  
When you walk into a space regardless of whether it is a home or an office, your eyes will tend to wander throughout noticing objects and colors. Color usually cause the main visual impact and causes the eye to follow the space. This is why many home decor and or interior decorators will use deep bold colors to create a focal point wall in a small area of the space. 

Bold colors will tend to immediately draw your visual attention, hence making it a focal spot. If you want to avoid unintended focal points throughout, you will need to avoid deep/dark and or bright varying color changes in the space.  

Clutter
Have you ever had the feeling that there is just "too much stuff". The reason for this at times is not necessarily that there is " too much stuff" per say. It may quite be that the pieces used in the decor, furnishings or even the colors of these objects may indeed be obstructing your visual flow. 

Transparency and or Opacity
Keeping the pieces light in color will keep the eye moving through the space making it appear to be larger than it actually is. Especially in smaller living quarters. 

It is to be expected that the colors used on your walls may well not be the exact match available for the options in spray paints available on the market. Nevertheless you may choose to have the same color made in a spray option if your project is not budget limited. 
If you want to keep the budget friendly option, then you can opt to go for the closest shade possible to your wall color and always choose a shade lighter than the closest match. You can choose the Glossy option for an extra punch or stick with the flat finish to really make it blend inconspicuously.   

Note: Even though it may be obvious that an object is there, this will fool the eye keeping it from focusing on the object, hence creating an improved more appealing visual flow.

What is wood veneer?
Veneer is usually a thin slice sheet of wood that is glued to a larger baseboard such as a fiber or particleboard sometimes known as Medium Density Fiberboard. This is normally done to give the furniture piece the look of hardwood with all of the grains and wood rings. By doing so, detail and interest is added to the furniture piece without the expense of real solid hardwood. 
Depending on the manufacturer of the wood veneer, some maybe applied by gluing it down or by ironing it down onto the desired surface. 
Refinishing home entertainment equipment furniture to complement your interior design
Before sanding make sure you cover the speakers woofers and any ported openings on the speaker box as to prevent dust particles from entering the circuitry. 

Refinishing home entertainment equipment furniture to complement your interior design
Time to sand away. Wait not quite ! 
Take a good look at your sandpaper by choosing a fine grade sandpaper (400 - 600 grit). The key here is not to sand so deep into the wood veneer, that you sand away the details in the grains.

The reason for sanding the veneer is to eliminate as much of the original glossy finish as possible. This will help the new finish adhere with a better bond to the speaker box.  
But you must remember that veneer is a very thin layer of wood adhered to another material as a base usually particulate board and or MDF, therefore "sand with care".

Refinishing home entertainment equipment furniture to complement your interior design
In the above image we used a sea blue as the base color for the speaker cabinet. This made sure that the original black color was completely covered avoiding too many coats of paints. This color was also within the range of hues used on the walls where the speaker will be placed. 
Refinishing home entertainment equipment furniture to complement your interior design

In the image above you can notice how the speaker now blends in with the wall behind it. 
For those whom are familiar with speakers, also know that the grills are typically of a black mesh like material. Here we painted the woofer grill to also match the enclosure box.   
The colors used for this project were of a flat finish taking into account the same finish on the walls. 

In the above images we have demonstrate how the speaker now blends into the scheme of the decor. The first picture was taken with bright lighting in the space and the flash feature on the camera enabled. 
The former image was taken with flash disabled to provide a darker example of what it would look like in a darker environment. The walls, decor and new speaker finish makes for a lighter feel throughout.  

In this image we wanted to give you an idea on how closely matching the color of your entertainment equipment to your walls can help create fluency and visual flow without making the items in the space feel too heavy. 

Here we used a deep charcoal black on the walls as the backdrop for the LED TV and the Horizontal CD Rack that sits above the TV just below the ceiling.  
We must also mention that the color used on the wall were for a family room and NOT a dedicated Home Theater Room. This turned out to be truly amazing, considering it blended splendidly with the rest of the home design and decor.  

NoteThis technique will make the equipment really disappear, especially when watching your favorite TV programing at night time, giving the space "the feel" of a dedicated Home Theater. 

The wood veneer of the CD Rack above the TV was refinished in a deep black lacquer to also match the bezel of the TV. ( More on how to refinish with lacquer paint in near future).   

This is a close up image of the deep charcoal black color of the wall and a corner of the black TV bezel. 

Note: We do not recommend using lustre and or glossy wall paint in this area, as it will always tend to bounce too much light when watching the TV or with the ambient lights on. 

The short video snippet below was taken with the lights in the space complete off. As you can see, the outcome resulted in the total disappearance of the entertainment equipment and the wall behind it "perfect for movie nights". The subtle cool blue spotlights seen on each side of the TV set are an option for a "less pitch black ambiance". 

Publisher Note: Images viewed on the Tv monitor are
for demonstration purposes only and are therefore non-sponsored 
and unrelated to this post. 

Please take a further look into more of our D.I.Y projects and LIKE US  when visiting our YouTube channel.  

Wednesday, February 7, 2018

How To Ideas for Clay Pottery & Planters

A clay pot and or planter refinished with metallic colors and used in interior decor

If you have ever taken a look at the conventional clay pot/planters sold at your favorite home improvement store and or nursery, your first impression may well be,NOT impressed at all. These may tend to look cheap, bland and unimpressive. 

Nevertheless,I challenge you to take a closer look!   

Many of us may not even consider it, but clay pots besides being made of an organic matter, it is very versatile and easy to work with in different projects. Careful though, they are easy to crack/break.  

Some interesting facts about Clay Pots are

a) They adapt to the environment very well.

b) Pottery forms an intricate part in many cultures around the world,but originated in ancient egypt. 

c) There are different types of clay and each are distinct in their organic compositions and how they are used. Within these are Kaolin or (porcelain), Fire, Stone and Earthenware Clay which is the most common type found.

d) They can be used in the yard for planting your favorite greenery or in the kitchen for slow cooking your favorite food. 

Note: Clay cooking pots usually undergo a glazing process prior to being used for this purpose. Make sure your purchase is suitable for this cause.

_________________________________________________________________________________
_________________________________________________________________________________
In this tutorial we will look at an up close idea on using clay pottery in ways other than for planting.


Here is a photo of a medium clay pot you may or may not be familiar with. These are very much inexpensive when considering the price you pay for a generously sized pot. For the project in this post we used medium small clay pots, keeping in mind they will be used as centerpiece decor items. 

Metallic RustOleum spray paint cans.
Above are a series of RustOleum metallic spray paint we used for this project. We can't stress enough how important it is to stick with the same brand of paint. Whichever brand that may be for you, go with that for all your color choices. 

A perfect example on how reflective these paints are,is demonstrated perfectly in the first image of this post below the title, where the reflection of the glass candle holder is seen clearly on the painted surface of the clay pot.     


A clay pot and or planter refinished with metallic colors, embellished with a Oyster shell Clustered ball and used in interior decor as a centerpiece

In the above images you can see how the different tones of the metallic paints of steel(as the main background color,rose pink and pearl mist (as undertoned hues) gave the final outcome of the pot and shells a subtle and distinct gorgeous sparkling effect.

Important: Because the clay material used to make these pots or planters is of an organic matter, it can be very porous, therefore you do not want to skip the base coat layer of paint prior to applying your metallic colors.    

a.We also applied some steel metallic layer of spray paint to the oyster shell ball which we nestled into the clay planter.
(More on these shell cluster balls in a future post.) 

b.A couple large reflective tri colored glass beads were placed between the oyster shells giving it the "Gem pearl in a shell" look if you will.

Here we used another clay pot painted in metallic chrome. Added some hints of metallic coral blue which ties into the shell cluster we used to anchor this great centerpiece to the dining area. 

Just another view of the centerpiece with the chandelier lights on. The glow and shimmer of the lights and crystals onto the centerpieces metallic colors truly stikes a conversation during meal times.   

Another close up view taken at day time. The metallic chrome color really gives it a mirror like effect and helps prevent the centerpiece from feeling too heavy in the space. 

A clay pot and or planter refinished with metallic colors, embellished with a Oyster shell Clustered ball and used in interior decor as a centerpiece
   
In the above image we painted another clay pot and oyster shell clustered ball with a metallic chrome spray paint as our main background color, and added some metallic hints of pearl mist and Sea Mist blue hues used as undertones, gives this planter and oyster shells cluster a reflective mirrored like look which we loved for this outdoor theme.

A clay pot and or planter refinished with metallic colors and used in interior decor

Another look at the outcome of this project which sits on a chrome oriental cylinder  side table that anchors the seating area of this outdoor space.  

Conclusion: Rethink, Repurpose,Reuse. There are always ways to use simple items around your home to add a fresh new look to any space. When it comes to Decor, you don't always have to run to the nearest brick and mortar store for that next new item. 
Choose a theme that goes with your interiors scheme and don't be afraid to mix it up a little. Who knows,with some ingenuity you may even come up with your "very own" next conversational piece of decor item.    

Please take a further look into more of our D.I.Y projects and LIKE US  when visiting our YouTube channel.     

Tuesday, January 16, 2018

Organic Home Remedies for Seasonal Allergies

A Home Organic remedy for Allergies,Cold & Flu made with ORganic Lemon,Honey,Organic Onions,Organic Garlic, Organic Ginger & Green Apples, Cinnamon
Note: As mentioned before on previous post in our " All Things Home Page" we from time to time take a well deserved break from  the interior/exterior home decor world and partake in other things that make a house a home. Hence keeping Spaces Made Perfect fresh and informative. 
The seasonal changes are here and we all know what that entails!  When most creatures in nature are asleep and taking a break from procreating per say, the viruses and bacteria seem to thrive creating havoc on many of us. 

Conversely, we all know that a strong immune system is the number one defense against these seasonal allergies attack. Nevertheless when the body lets one of these intruders in, it at times need some extra help from outside sources to eradicate the problem and keep them at bay. 

In this short post we will demonstrate how to make an Organic Home Remedy concoction for Seasonal Allergies, Colds and Flu symptoms. 
______________________________________________________________________________________________________________
The Story behind this Remedy: What encouraged us to share this recipe, was how well it worked and has continued to work for ourselves and our loved ones. It all began when my spouse woke up one morning with swollen tonsils, painful swallowing and some horrible looking white spots all over the sides of her mouth. Our first impression dwelled on the thought of the dreaded "strep throat" Aka: streptococcus. Any of our kids had been previously sick at the time and considering this affects mainly children and teens, we were even more puzzled. 

The wife recalled an old recipe that was given to her by an acquaintance at her hair salon a couple days prior to feeling ill. This remedy was  given to the mentioned acquaintance by her latin american grandmother of whom lived on the countryside hills. We decided to put this concoction to the test and to our blessed surprise, after just one night of ingesting a hot cup of this tea she woke up with absolutely NO white spots on her tonsils and her ability to swallow without much pain was improved by about 40%.  There you have it, a good enough reason for us to want to share this with our social media world.  
________________________________________________________________________________
Below are some of the ingredients and tools recommended to make this process quick and effortless: 

Note: Just like any and or most conventional forms of medicine(s) on the market, you may need to take this home made remedy for a couple days to ensure that the symptoms caused by the virus or bacteria is completely done away with. 

You want to go with Organic ingredients, because you will want use the skin of these ingredients in this recipe which will give the tea a greater punch, stockiness and added benefits.

1.  (1) Organic Onion
2.  (1) Organic Garlic
3.  (1) Organic green apple
4.  (2) Oz. of Organic Ginger root
5.  (1) Organic Lemon
6.  (2 tsp.) Cinnamon Powder
6.  (1) tsp. of sea salt: optional (salt act as an electrolyte making you feel hydrated
7.   Local raw honey if you have a sweet tooth (optional: for added sweetness)
8.   Chopping block, teapot or kettle
9.  16oz. of filtered water

(THESE INGREDIENTS SHOULD YIELD ABOUT 10oz. OF TEA.)

Remember: Because the skin of the organic ingredients will not have the pesticide residue as many conventional products we will use them (wash thoroughly, but keep skin) ! 

Now that we have all the ingredients on hand, why don't we watch this short video below on how it was all put together. 

Note: One detail we missed in the video, is that once the steeping process is done, you may want to remove all the stock from the liquid prior to storing your tea. This will reduce the bitterness of the final product.
We also recommend that you consume the end product within 3 days as means of preserving the integrity and effectiveness. 

~Our Hopes is that you feel Better~
 ~ENJOY~
This Video includes Subtitles/Closed Captions (CC) if you are not able to see them, please enabled them in your browser under the video settings option.  
Publishers Note: For educational purposes only. We do not make any medical claims with regards to this post. Always consult your health care professional prior to using alternative forms of treatment(s) as your condition may require immediate medical attention. This information has not been evaluated by the food and drug administration. 

Please take a further look into more of our D.I.Y projects and LIKE US  when visiting our YouTube channel.