In this post we will take a simple floor standing Cd rack and re-purpose it into a work of art that will not only provide warm and subtle illumination to your living space, but also serve as an interesting and unique conversational piece.
For this project we will only need a few simple tools that any beginner Do It Yourself and/or beginner handyman or handy-woman should have at his/her disposal.
Items Required are:
1. floor standing CD Rack
2. 60 x 1 inch Pine wood (Pine wood is inexpensive and we love it because its wood grains are very bold and pronounced when stained.)
3. Metallic Spray paint (your choice of color(s))
4. Lamp Pull Chain & Sockets kit (your choice of 1 or 2)
5. Sample size can of PolyUrethane wood stain
(This step may be skipped by simply painting the wood)
6. Staining cloth or lint free cotton cloth (if using wood stain option)
7. 8 x 8 x 1 inch square of pine wood
These are what some of these items look like. visiting your nearest local hardware store should have these readily available. We chose Minwax Poly Shades for the wood stain because it provides color as well as the protection and sheen of polyurethane (2 in 1).
Tools Required are:
1. Drill, 1/4 inch & 3/8 inch drill bits
2. Wood glue (optional for a tighter bond)
3. Wood Screw
4. Cable ties and/or strip of cable organizer/management
Below are some images of what these items look like as we put this floor lamp together.
In this mage you can appreciate the metallic paint color used for the rack. The pull chain was kept in its original gunsteel color. The pine wood was stained,but we will see this up close a little later on.
Seen above is the base of the Cd rack sitting on a 12 x 12 concrete paver. This was a personal choice since we wanted the lamp to stand taller. You may choose to use any style finial. We opted for this round chrome style.
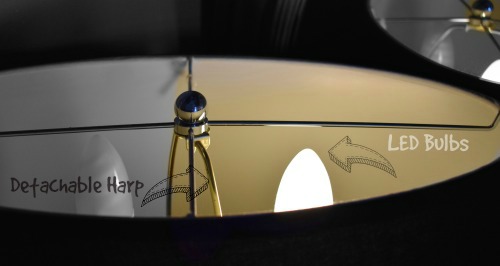
We opted to use two Lamp Sockets with Pull Chain,a large detachable harp and low wattage LED bulbs. Left(lights off)Right(Lights on).
Make sure your harp is large enough so that when the lampshade is harnessed it sits above the bulbs without making them visible at eye level.
Make sure your harp is large enough so that when the lampshade is harnessed it sits above the bulbs without making them visible at eye level.
Drill to create the 1/4 opening for the pull chain and the light socket harness that comes along with the kit.
You also want to drill holes about 3/8 inch in order to make the detachable harp fit snugly into the 8x8x1 square base.
Note: Since we are creating a double light socket floor lamp, "the steps you do on one side must be repeated on the other side of the top square base".
Here is an up close look of the pine wood used as the supporting leg. We opted for a polyurethane stain instead of painting it to give it a more sophisticated, interesting look.
The entire Cd Rack was painted in metallic steel spray paint. This blended very well with the charcoal background of the wall.
Above is a side view look at the rack near completion. A cable organizer was used to neatly keep them in place and tucked from sight behind the leg of the lamp.
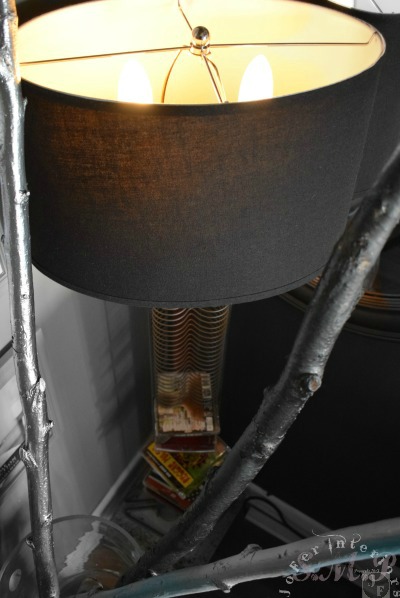
A gorgeous oval shaped,charcoal black, upholstered lampshade was used for the finished project.
Notice here that the 1 x 60 inch pine wood used for the leg takes the full length of the rack (top to bottom). We used cable ties to secure it to the bottom of the rack since we did not use wood at the bottom.
Another image of the finished product. We added a few SACDs and Audio Cd's from the owners vintage collection to give you an idea on how this old played out cd rack could still serve its original purpose, while bringing subtle ambiance lighting to the space.
Note: As we mentioned previously, take notice on how the lampshade sits high above the LED bulbs.This photo taken at birds eye view,shows you how you can't see the wood base and sockets used for this lamp. Mission accomplished.
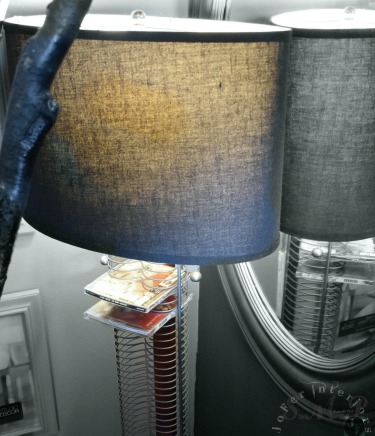
Another close up on how the Cd and DVD Media sits on the top rack. This was used in a living room space and by coupling it with a black lampshade and the black steel metallic paint on the rack, it blended perfectly with the charcoal colors of the walls.
If you have a dedicated media room such as a Home Theater, this will be a perfect match for such a theme.
Below we have added a short video snippet of the completed project
~ENJOY~
Please take a further look into more of our D.I.Y projects and LIKE US when visiting our YouTube channel.
Please don't forget to leave us a comment and remember CREATE IT....LOVE IT....SHARE IT !
Below we have added a short video snippet of the completed project
~ENJOY~
This video was created and meant for information purposes and is in no way
related to the content ads viewed on this page.
Please take a further look into more of our D.I.Y projects and LIKE US when visiting our YouTube channel.
Please don't forget to leave us a comment and remember CREATE IT....LOVE IT....SHARE IT !


No comments:
Post a Comment