lighting fixture suited for any home decor or themed event, and the garden is no exception.
In this short post we will take a common galvanized aluminum with copper lining watering can and turn it into an illuminated garden chandelier that will sure add a pop of glam and sparkle to any outdoor space.
Below you will see a few of the items used to repurpose this gardening tool.
In the above image you can view the gardening watering can which was an inexpensive purchase at a local home improvement store for about $16.
What caught my attention about this item, was the ability to remove the watering head as you will see below.
The removal of the head or spout of the can allows for a greater watering flow when needed. The Head of the can is normally used when also wanting to water the plants foliage.
Also note the generously sized pre-drilled holes that can be viewed from the inside of the head. This is key to making our desired project work, as you will see below.
More on why this option works best for the overall outcome of the project at hand.
In the three photos above (left) shows the interior of the can and the nozzle opening that leads up towards the cylinder and tip. the (middle) image shows the nozzle opening at the tip of the cans cylinder and the (right) image simply shows the same nozzle tip at an angled view were the watering head or spout is normally attached.
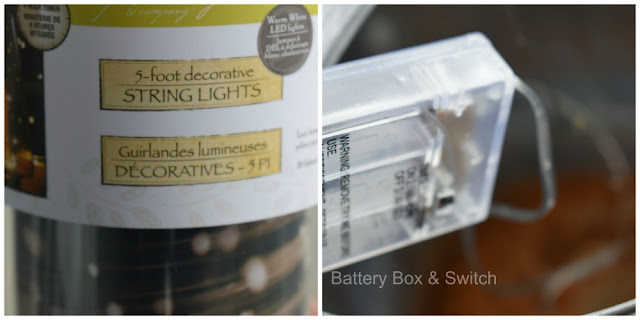
Above is a picture of the LED string lighting used for this project. We chose a 5-foot strand, but the choice is absolutely yours. In the image to the (right) we have the included battery box and switch used to operate this string light.
Note:If are going to use this project in an area that will be subject to moisture and rain, my suggestion will be to waterproof the battery box by using some clear silicone to seal any openings including the area were the fuse is covered by the plastic tubing.
Here you can view how the LED light strand have been fed through the interior nozzle opening of the can all the way up and out the watering nozzle head and or cannula.
Note: These LED strands are very inexpensive and very malleable so you can maneuver small openings as you will see in the latter images.
This next image shows how the strands were fed up and through the nozzle tip and bunched inside the watering head opening (right image),as means of having the light reflect through the pre-perforated holes, giving a nice shimmering glow to the crystal teardrops.
Ornament hooks were used to attach the crystal garlands to the head of the watering can, by simply inserting them into the pre-perforated holes on both the garlands and the head of the can. A pair of pliers was used to twist the hooks to each other keeping them in place and then bent inward to conceal them into the head of garden can.
Important: It is important to notice that you must first insert the LED string of lights into the head prior to attaching the garland with the ornament hooks. Inverting the steps will make it difficult for the insertion of the lights.
The head of the gardening can is now screwed back onto the nozzle (Top Left) and we have now hung the teardrops in the desired lengths to get that cascading effect.
Now you are ready to hang this gorgeous piece anywhere you like. As you may have noticed in the images above, we chose to hang it in a roofed outdoor patio area were we grow most of the herbs bushels that require mostly shade.
Another image of this gorgeous outdoor chandelier displaying all of its shimmer and glory under the duskly, nightly skies.
Note: You may also omit the use of LED lights and simply use this piece as an outdoor suncatcher chandelier. The organic flare of the sun reflecting on the crystals will display a prism like glow of colors throughout your garden and or sunroom.
Please take a further look into more of our D.I.Y projects and LIKE US when visiting our YouTube channel.
Create It....Love It....Share It !


No comments:
Post a Comment